Neutral Pelvis, Cont.
Props and modifications to help you exercise in a neutral pelvis
In our last blog, we discussed the neutral pelvis: why it matters, and how to find your neutral in a variety of positions: sitting, standing, and laying on your back (or supine). Ideally, a neutral pelvis is one from which you can comfortably move, meaning we can effectively work the core and hip muscles without strain on the back or pelvis. Not everyone can comfortably find neutral without props or modifications - sometimes tension in the body, injury, or habitual postal patterns restrict the body’s ability to comfortably be in neutral without strain. If that sounds familiar, read further! This month we’re focusing on ways to prop or modify to make your neutral pelvis feel a little more comfortable, and possibly even a little more familiar.
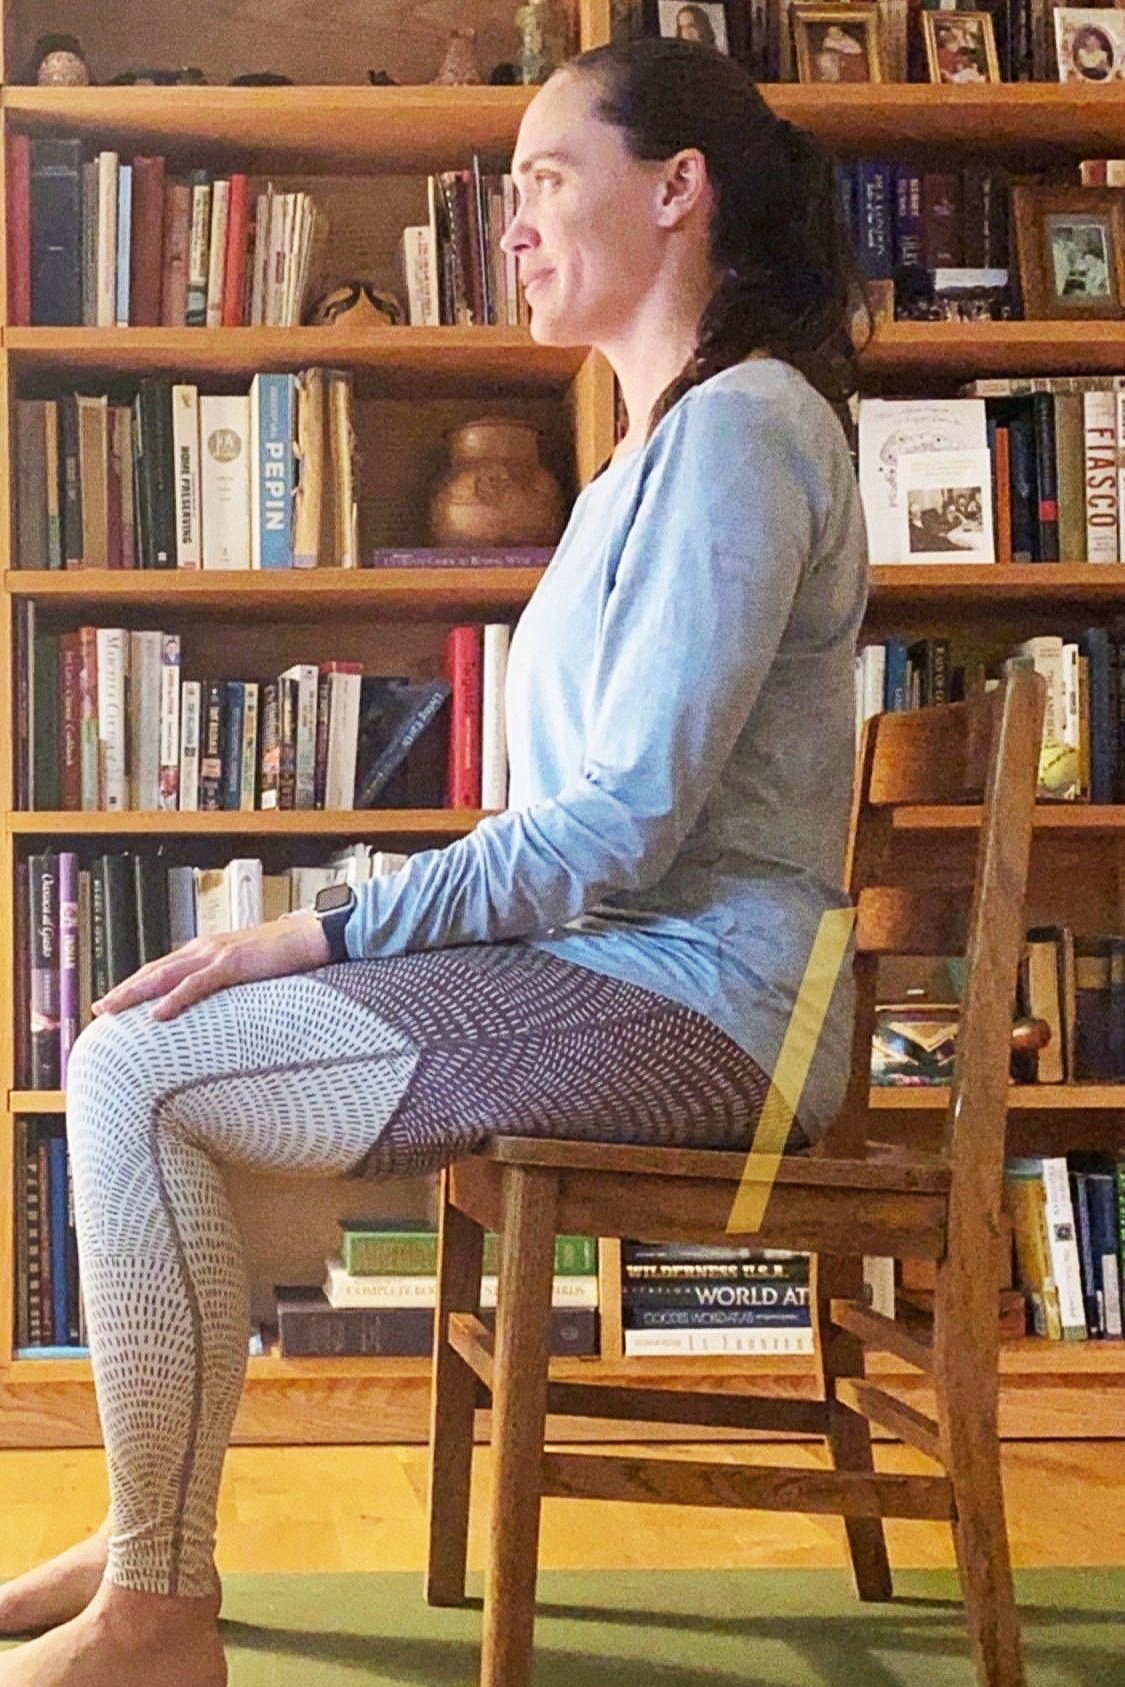
Sitting in a chair
Common Challenge: Many people find it challenging to sit upright, with their sitz bones pointing straight down into the chair.
Is this true for you? This might indicate some tightness in the back of the hip.
Try this: Place a towel or blanket on top of the chair - this raises your hips relative to your knees and decreases the angle at the hip, allowing more ease as your pelvis sits upright.
Pro tip: Most cars have “bucket seats” where our hips are lower than our knees. If your low back bothers you after driving, try using a wedge or a towel in the seat to raise your hips more to knee level so that it’s easier to sit in a neutral pelvis. It often helps!
Sitting on the floor
Common Challenge: Many people find it challenging to angle their sitz bones to the ground, and end up rounding the low back (pointing the sitz bones forward).
Is this true for you? You may have some tight hamstrings!
Try this: You have two options to play with, bending the knees and sitting on a prop. Bending the knees decreases the tension on the hamstring muscles and might be enough to allow you to find a neutral pelvis. If you still feel tension, try sitting on a prop (or a few!). Stack towels/blankets/pillows/etc until you’re able to sit tall, sitz bones pointing down. Bending the knees while sitting on props can give you even more ease if you need it.
Standing - sway back
Common Challenge: Some people stand with an exaggerated curve in the lower back, called lordosis, or sway back. This standing posture can lead to lower back and hip pain or discomfort.
Is this true for you? When standing, our hip flexors need to lengthen (hip needs to extend to 180 degrees). If our hip flexors are tight, they may not allow that lengthening, and will pull the pelvis into a forward tilt.
Try this: Soften your knees! Since our hip, knee, and ankle joints all work together, when we bend our knees, the hips flex as well. This little bit of hip flexion can help your pelvis get to a more neutral place.
Standing - tucked pelvis
Common Challenge: Many people find that their sitz bones want to point slightly forward, causing the sacrum to tilt back (which removes the neutral curve in the low back).
Is this true for you? For anyone who tends toward an overly tucked tail coming out of this alignment is often about changing habit. A favorite way to change habit is through imagery!
Try this: Bending your knees a little, imagine a duck’s tail feathers. Can you feel a slight lift of your tail bone and sitz bones away from the back of your thighs, as if you’re a duck lifting your tail feathers? Can you keep your tail feathers lifted as you straighten your knees?
Laying on your back - sway back
Common Challenge: For those with a forward tilt to their pelvis, imprinting the low back to the earth can be very challenging, especially with legs in table top.
Is this true for you? You may often feel like your lower back is working overtime while doing core work, or that you have to be very careful so that core work doesn’t “mess up” your back.
Try this: Place a prop under the tailbone and bottom of sacrum, which will help tilt your lower back closer to the floor, making it easier to use your abs to maintain your pelvic position. You can use a wedge (in the Pilates studio), or a folded up towel or blanket at home. If your arms aren’t involved in the exercise, you can even use your hands - place one hand on top of the other and slide them under the base of your pelvis.
Laying on your back - tucked pelvis or Pilates newcomers!
Common Challenge: If you tend to over tuck the pelvis or are new to Pilates it can feel unfamiliar to find and hold a neutral pelvis.
Try this: Start by finding your neutral in supine, as we demo-ed in our previous blog. Once you are confident knowing where that is, you’re going to place a rolled up towel under the space of your lower back to fill in the space between your spine and the floor. (Note that gravity has an effect on all of our flesh when we’re laying on our backs - gravity will pull your muscles, skin, organs and fat downwards, so we want to try to fill the space between the bones of the lower back and the floor - not the space between the flesh of the lower back and the floor.)
Pro Tip: The size of the towel roll is dependent on your spine! We all have a curve in the lower back in neutral, but some curves are bigger and some are smaller. Experiment with more or less of a roll to find what feels big enough to be supportive but not so big that it pushes you out of neutral, or adds a lot of pressure to your lower back. If your towels are fluffier and/or your spine has a smaller curve, it’s fine to roll up part of the towel, and have the remaining towel lay unrolled under your sacrum.
More questions on how to modify to support neutral?
Come to class, or schedule a private session! Our instructors can add their expert eye to help you feel confident you’re finding your neutral.


